

Last Updated on December 12, 2025 by Rida Hamid
Professional photographers click a lot of duplicate photos to select the best out of the rest. When they run out of space, they plan to delete duplicate photos from their SD cards. Duplicate photos are unwanted clutter that takes up a lot of space in the storage. Removing duplicate photos manually from the digital camera or from the computer can be a little tricky yet we can’t erase all the duplicate photos. There you need the best duplicate photo remover to find duplicate photos!
The best duplicate photos finder for Windows is the best solution to remove duplicates & similar photos from all storage devices. This is a 3-step easy process that automatically finds and helps you in removing duplicates. There are several duplicate photo removers available on Google however it’s hard to identify the best. We have compared a few of the best duplicate photo removers and listed the ones that worked great on SD Cards. Let’s try the manual methods first!
Delete Duplicate Photos on the Camera
It’s a tough affair but if you have got a few of the photos on the SD card, you can preview them on the digital camera and delete the unwanted ones. You can also put your camera in the presentation mode and it will run a slide of all the photos. If you come across a duplicate photo, you can delete the photo then and there.
Find Duplicate Photo on Windows
It’s easier to find and remove duplicate photos on Windows than to remove duplicates on the Camera itself. Here you can explore all the photos at once and select them one by one. It’s convenient and easy to delete duplicates using Explorer.
Step 1. Insert your SD Card to the card reader and connect to your PC, (Win + E) will bring up the Explorer window.
Step 2. Open up the photo album on the SD Card that needs to be scanned.

Step 3. Configure settings to view thumbnails of all the available photos. Click the View menu, and select Large Icons under the Layout category.
Step 4. Scroll through all the photos to identify duplicates. Hold the Control key, click to select more than 1 photo, and Press Delete to send selected photos to the Recycle Bin.
Use the Microsoft Photos App
Microsoft Photos App allows you to preview all the photos on the SD Card. You can preview images, and delete them right from the Photos App.
Step 1. Connect the SD Card to your PC, go to Explorer, and double-click on the first image.
Step 2. Scroll down the images and when found a duplicate, press the Delete button or right-click on the image and select the ‘Delete’ option. This will remove the image from the storage.
Step 3. Follow the same with all the found dupes. Once deleted, empty your Recycle Bin folder.
Upload them on Google Photos
Google Photos has this advanced code to skip uploading duplicate photos in the same album. If you try to upload all the pictures on the SD card, it will only upload nothing but the unique images.
Step 1. Connect the SD Card to your PC.
Step 2. Open the browser, sign in to your Google account, and click on Albums in the left panel.

Step 3. Click Upload on the top right, select Computer, and browse photos from the SD card.
Step 4. Click Open to begin the upload process. If prompted, select Storage Saver instead of Original Quality to save space.

Step 5. Check all the uploaded photos. It will be less than the photos on the SD Card as it only uploaded the unique ones.
Step 6. Once confirmed, download the uploaded photos into a new folder. Delete the old ones from the SD Card if you are certain about your selection.
Use Automated Tool
Duplicate Photos Fixer Pro
You can automate the process with the best photo fixer tool for Windows. It offers a three-step process (Scan-Preview-Remove) to quickly find and remove duplicate photos from SD cards or other storage devices on Windows. You can scan all the internal or external hard drive partitions, folders, SD cards, Backup drives, USB sticks, or Google Drive cloud space for duplicate photos.
Using Duplicate Photos Fixer Pro is simple and easy!
Step 1. Download and install Duplicate Photos Fixer Pro from its Official link.

Step 2. Activate the product with a valid license key and configure the matching level settings.
Step 3. Click Add Folder, select the SD card, and click on the ‘Scan for Duplicates’ button to initiate scanning.
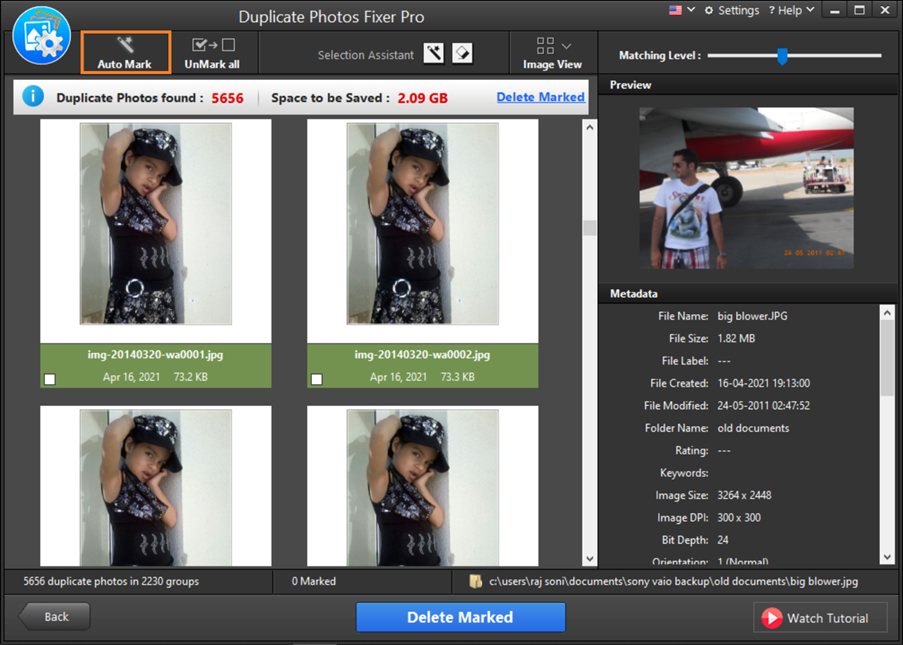
Step 4. Check grouped photos, preview images, select what to delete, or use the ‘Auto-Mark’ button, click on the ‘Delete Marked’ button.
Final Words:
We have compiled the best ways to find and remove duplicate photos on SD cards or other storage devices. Which one worked best for you, do share with us in the comment section. Duplicate Photos Fixer Pro will automate the process to remove duplicates. Keep it Dupe-Free!
Apart from this if you are interested to know about Duplicate Files Fixer then visit our Daily Bites category.


